
Appearance
Creating multiple listings pages based on categories
For large property listings, it can be helpful to split them into multiple pages organized by categories. For example, you could create separate pages for houses, apartments, and commercial properties, or you could divide them by sales and rentals. This can make it easier for visitors to find what they are looking for.
The approach is always the same: create a new page, add a Listings Page widget to it, and then use its settings to restrict which properties it shows.
Decide on your categories
Before you start creating multiple pages, you should decide on the categories you want to use. You can categorize your properties based on any select or multiselect field in your Residenda listings. For example, you might want to categorize your properties based on the following fields:
- Listing type: This field contains options like Sale or Rent.
- Property type: This field contains options like House, Apartment, Land, ...
- Listing status: This field contains options like Available, Sold, Reserved, ...
- ...
You are not limited to these fields. You can use any select or multiselect field in your Residenda listings to categorize your properties. You can also create custom fields to categorize your properties.
As you manage your properties, you will give each property a value for each of these attributes.
Prefer to watch?
Once you have decided on your categories, the video below walks through the rest of the process — creating the page, adding the Listings Page widget, and restricting it to a category. It shows the same steps described below, just in video form, so you can use whichever you prefer.
Add a new listings page
Open the Wix Editor.
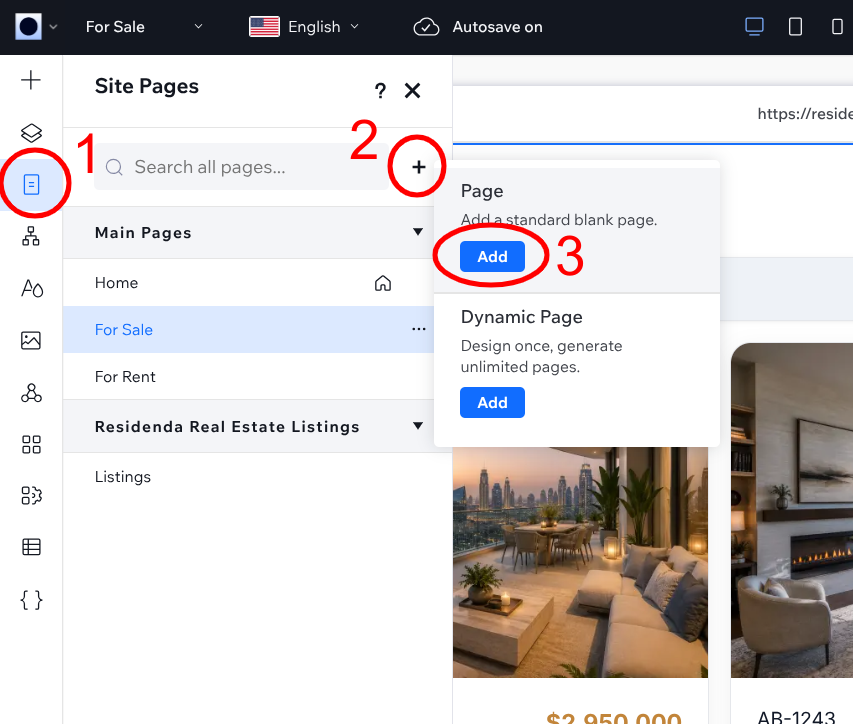
Create a new blank page: open the Site Pages panel from the left sidebar (1), click the + button (2), and click Add under Page – Add a standard blank page (3). Give the new page a descriptive name like Houses or Apartments.
Open the new page and click the + (Add Elements) icon in the top-left toolbar (1). Click App Widgets (2), then drag Listings Page onto an empty section in the middle of your page (3).
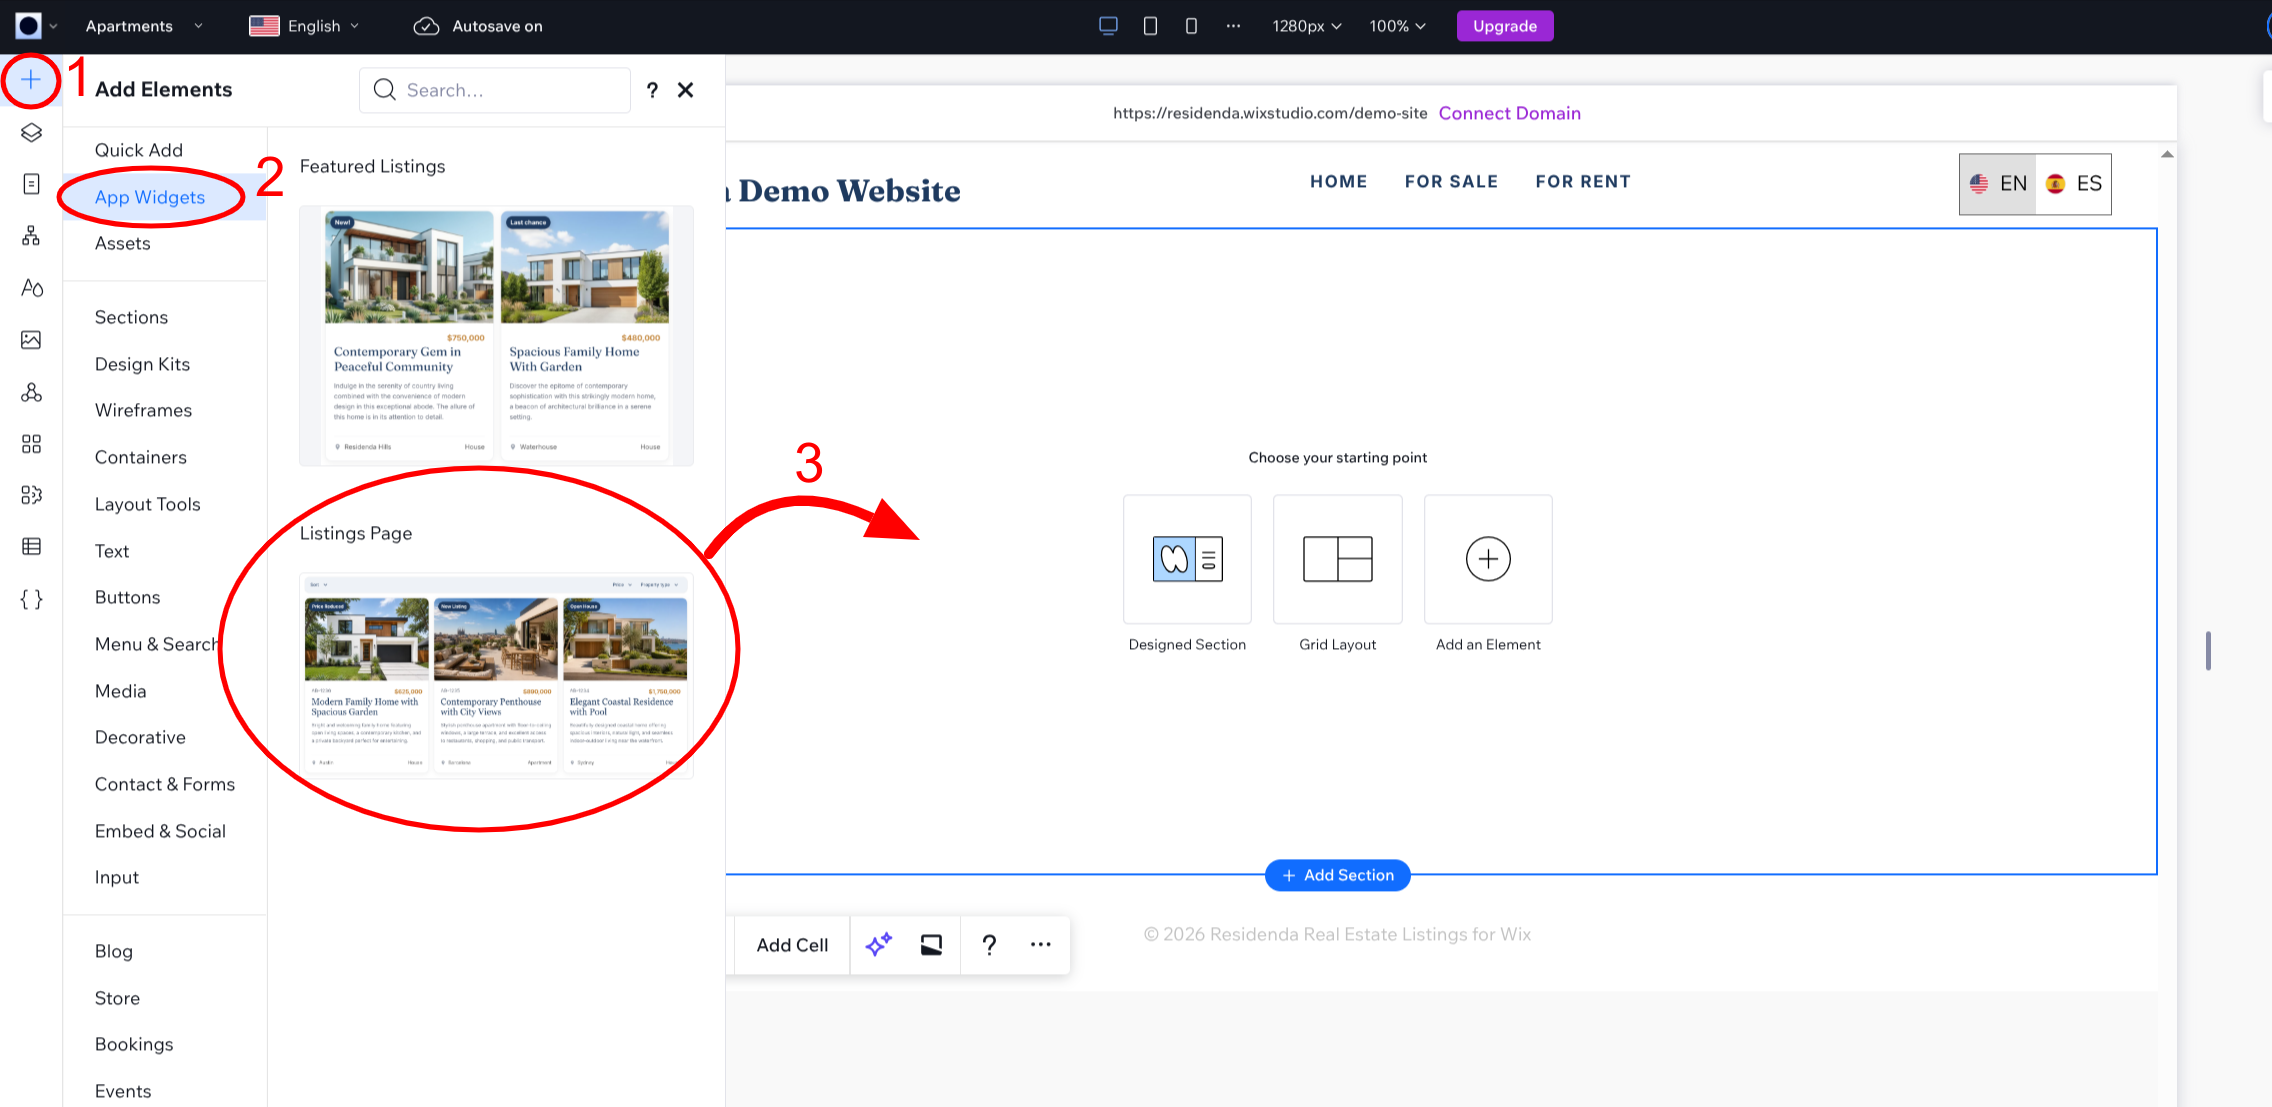
Make sure you choose Listings Page and not Featured Listings. The Listings Page widget shows the full, browsable list of properties, which is what you want for a category page.
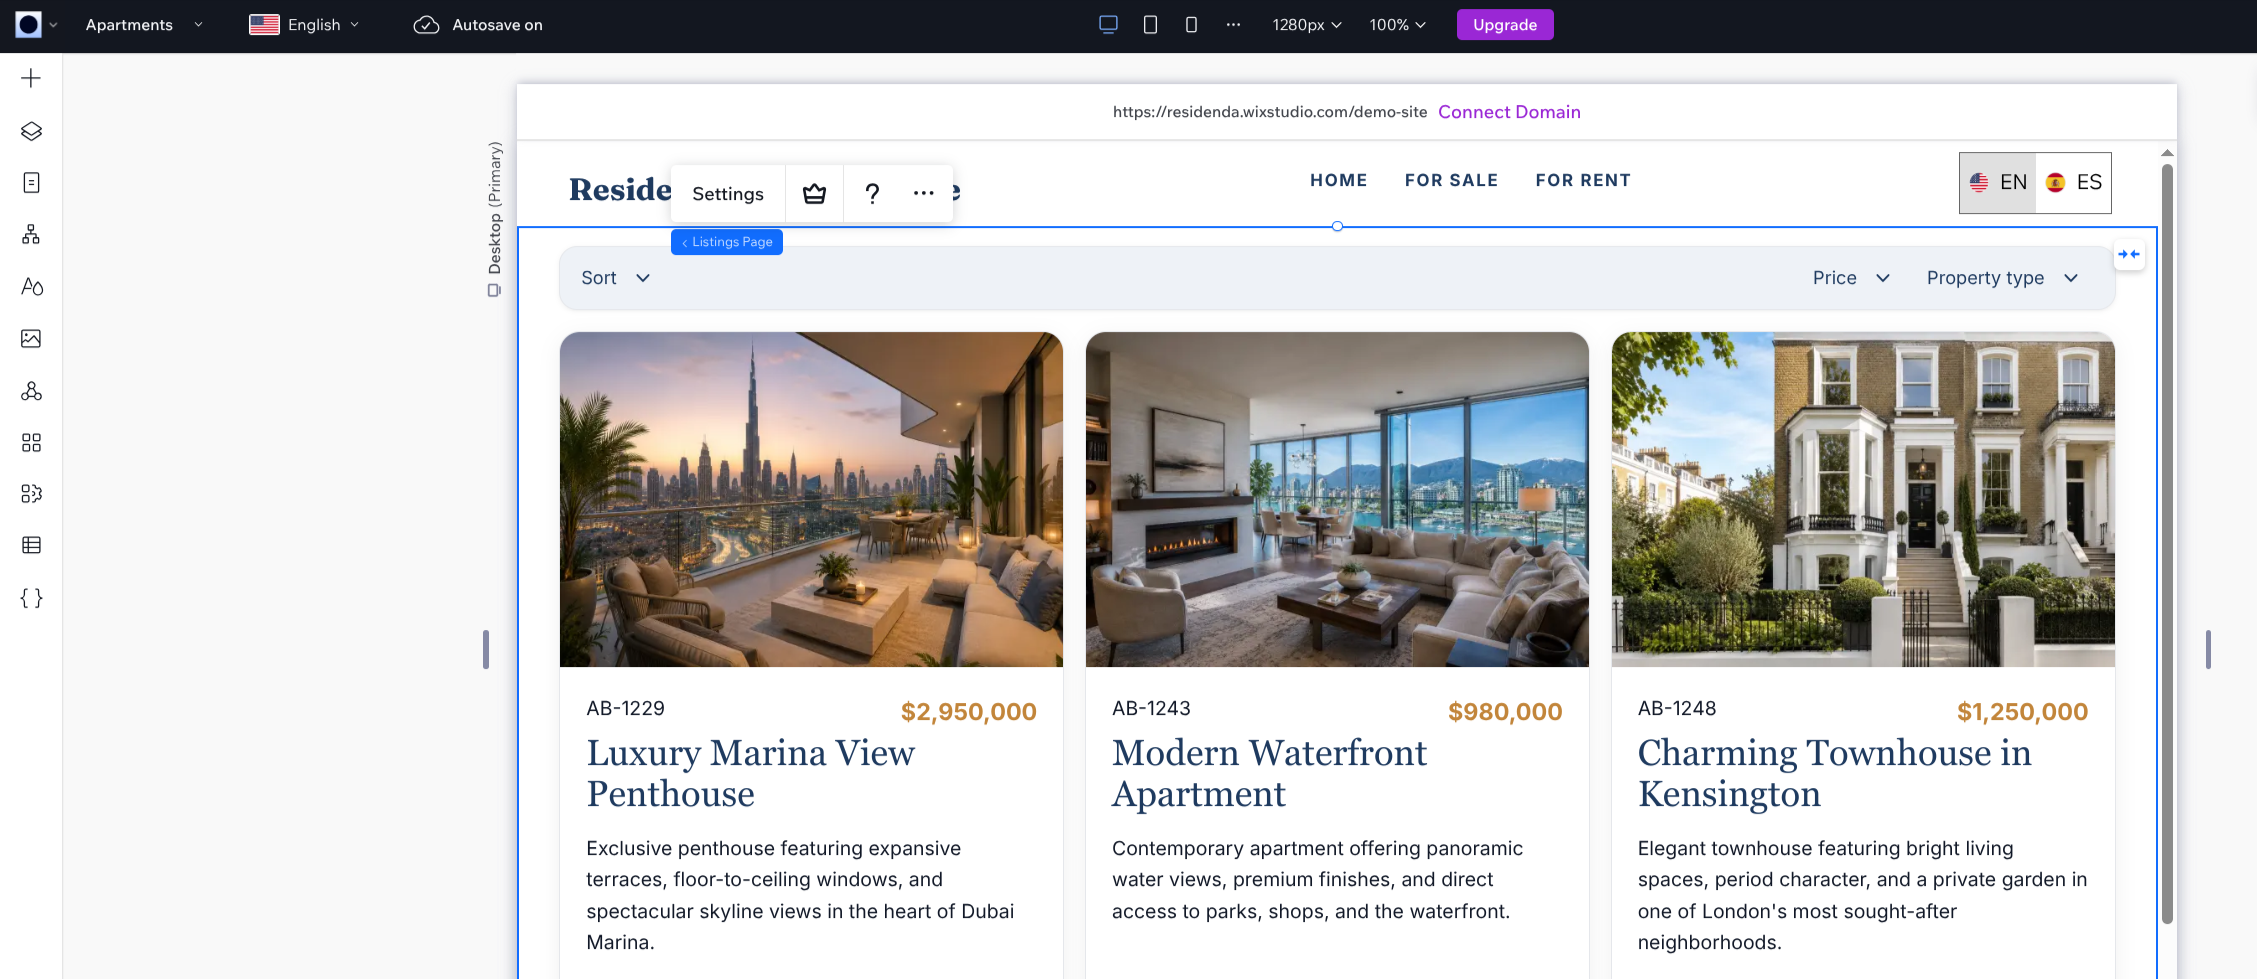
The widget appears on your page and immediately shows your properties. At this point it still shows all properties — in the next step you will limit it to a specific category.
Restrict the page to specific categories
Now configure the new page so it only shows properties from the categories you chose.
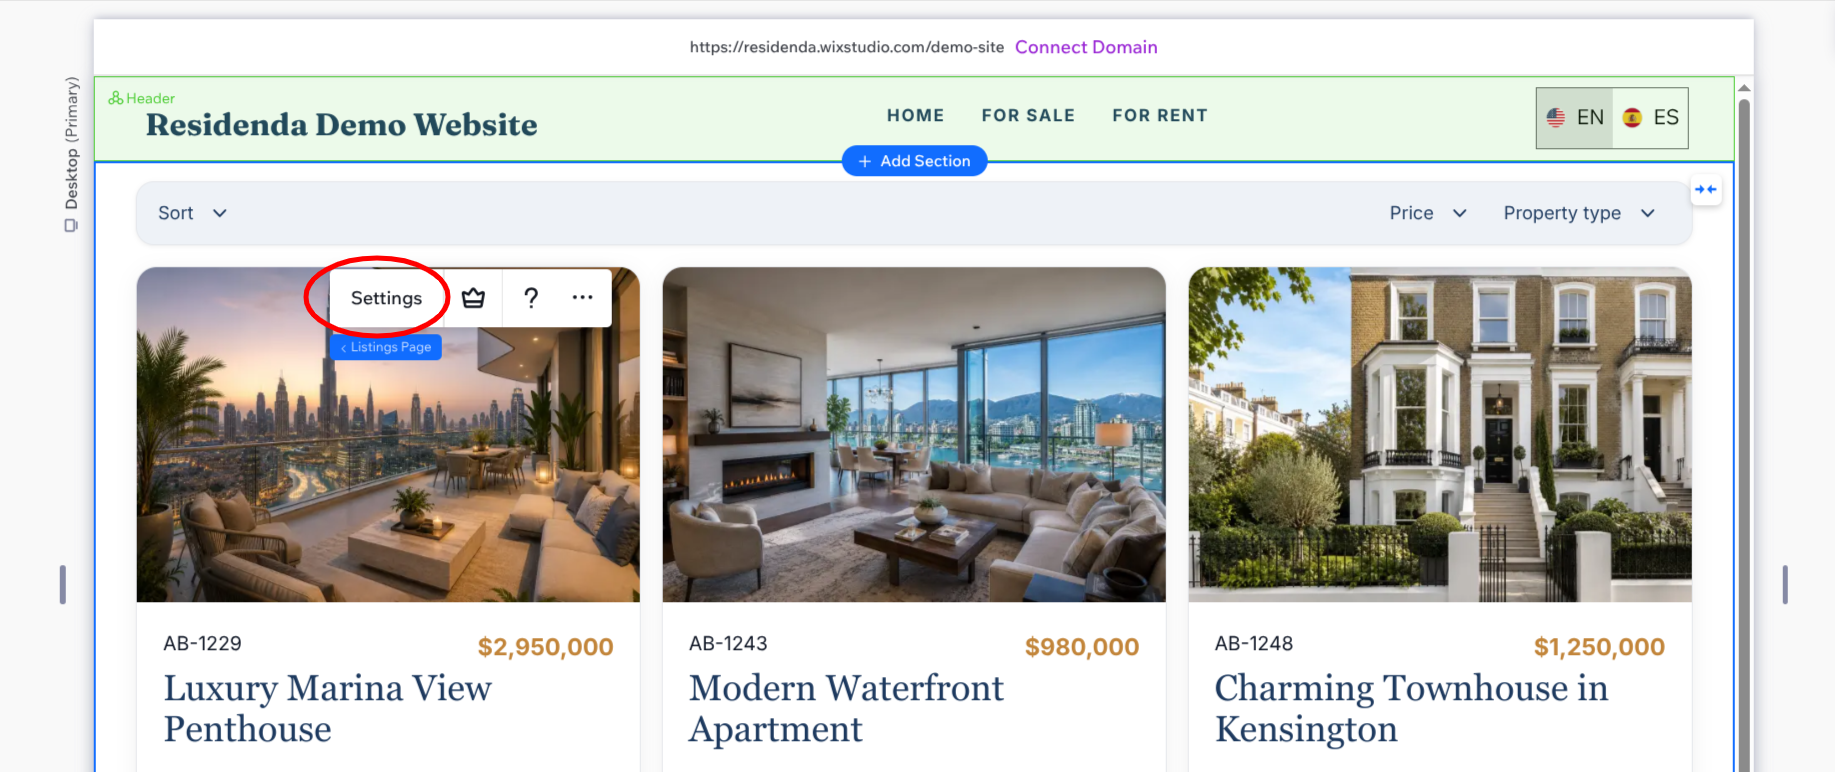
- Double-click the Residenda block to open its settings. Alternatively, click the block once and then click the Settings button that appears.
- In the settings panel, open the Filters tab. At the top you will see the message "If you only want to show properties from specific categories…", followed by a list of your fields and their values. Scroll down through this list to find the field you want (e.g. Property type or Listing type) and check the value(s) you want to show (e.g. Apartment or Sale).
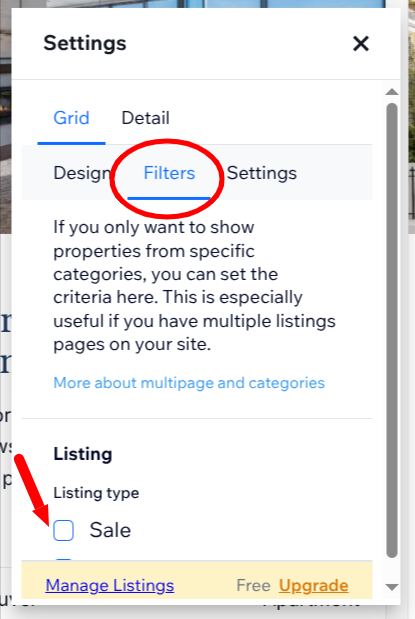
- You can check multiple values, and combine values from more than one attribute if needed.
- Your changes are saved automatically and will be immediately reflected on your live site. Click the X in the top right corner of the settings panel to close it.
Repeat for other categories
You can repeat these steps to create as many pages as you need for different categories. Each page gets its own Listings Page widget with its own category settings.
Remember, your original listings page will still show all properties unless you also restrict it using the same Filters tab.