Appearance
Table Customization and Filtering
The Residenda admin console provides powerful table customization features that help you work more efficiently with your property data. You can filter your data, customize which columns are visible, and save custom views for different workflows.
Overview
The advanced table features allow you to:
- Filter your data using advanced filter options to narrow down results
- Choose your columns by selecting which data fields to display and arranging them in your preferred order
- Save custom views to quickly switch between different table configurations
- Manage views by editing, deleting, reordering, or favoriting your saved views
Filtering Your Data
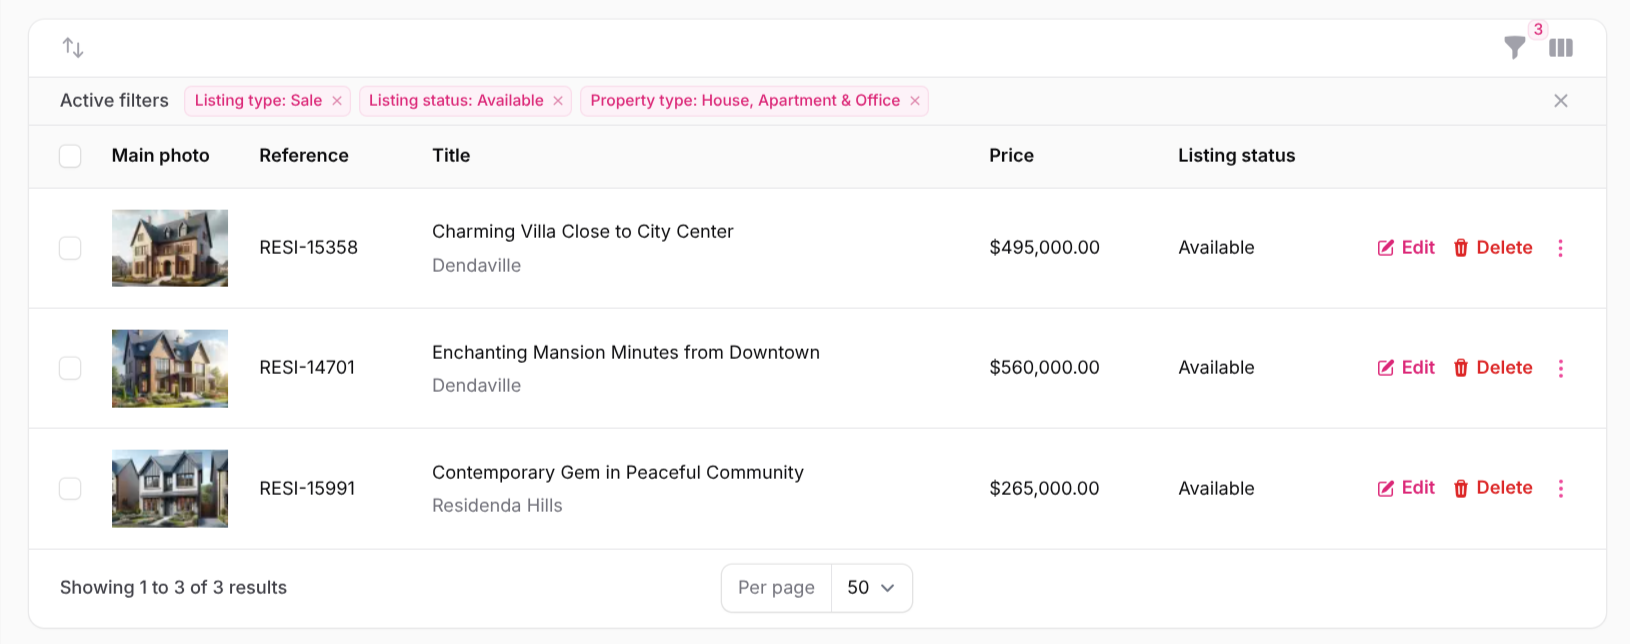
The filter functionality helps you refine and narrow down your property listings to focus on specific criteria.
How to Access Filters
- In the Residenda admin console, navigate to the Properties page
- Look for the filter icon in the table header toolbar
- Click the filter icon to open the advanced filter options
![]()
Available Filter Options
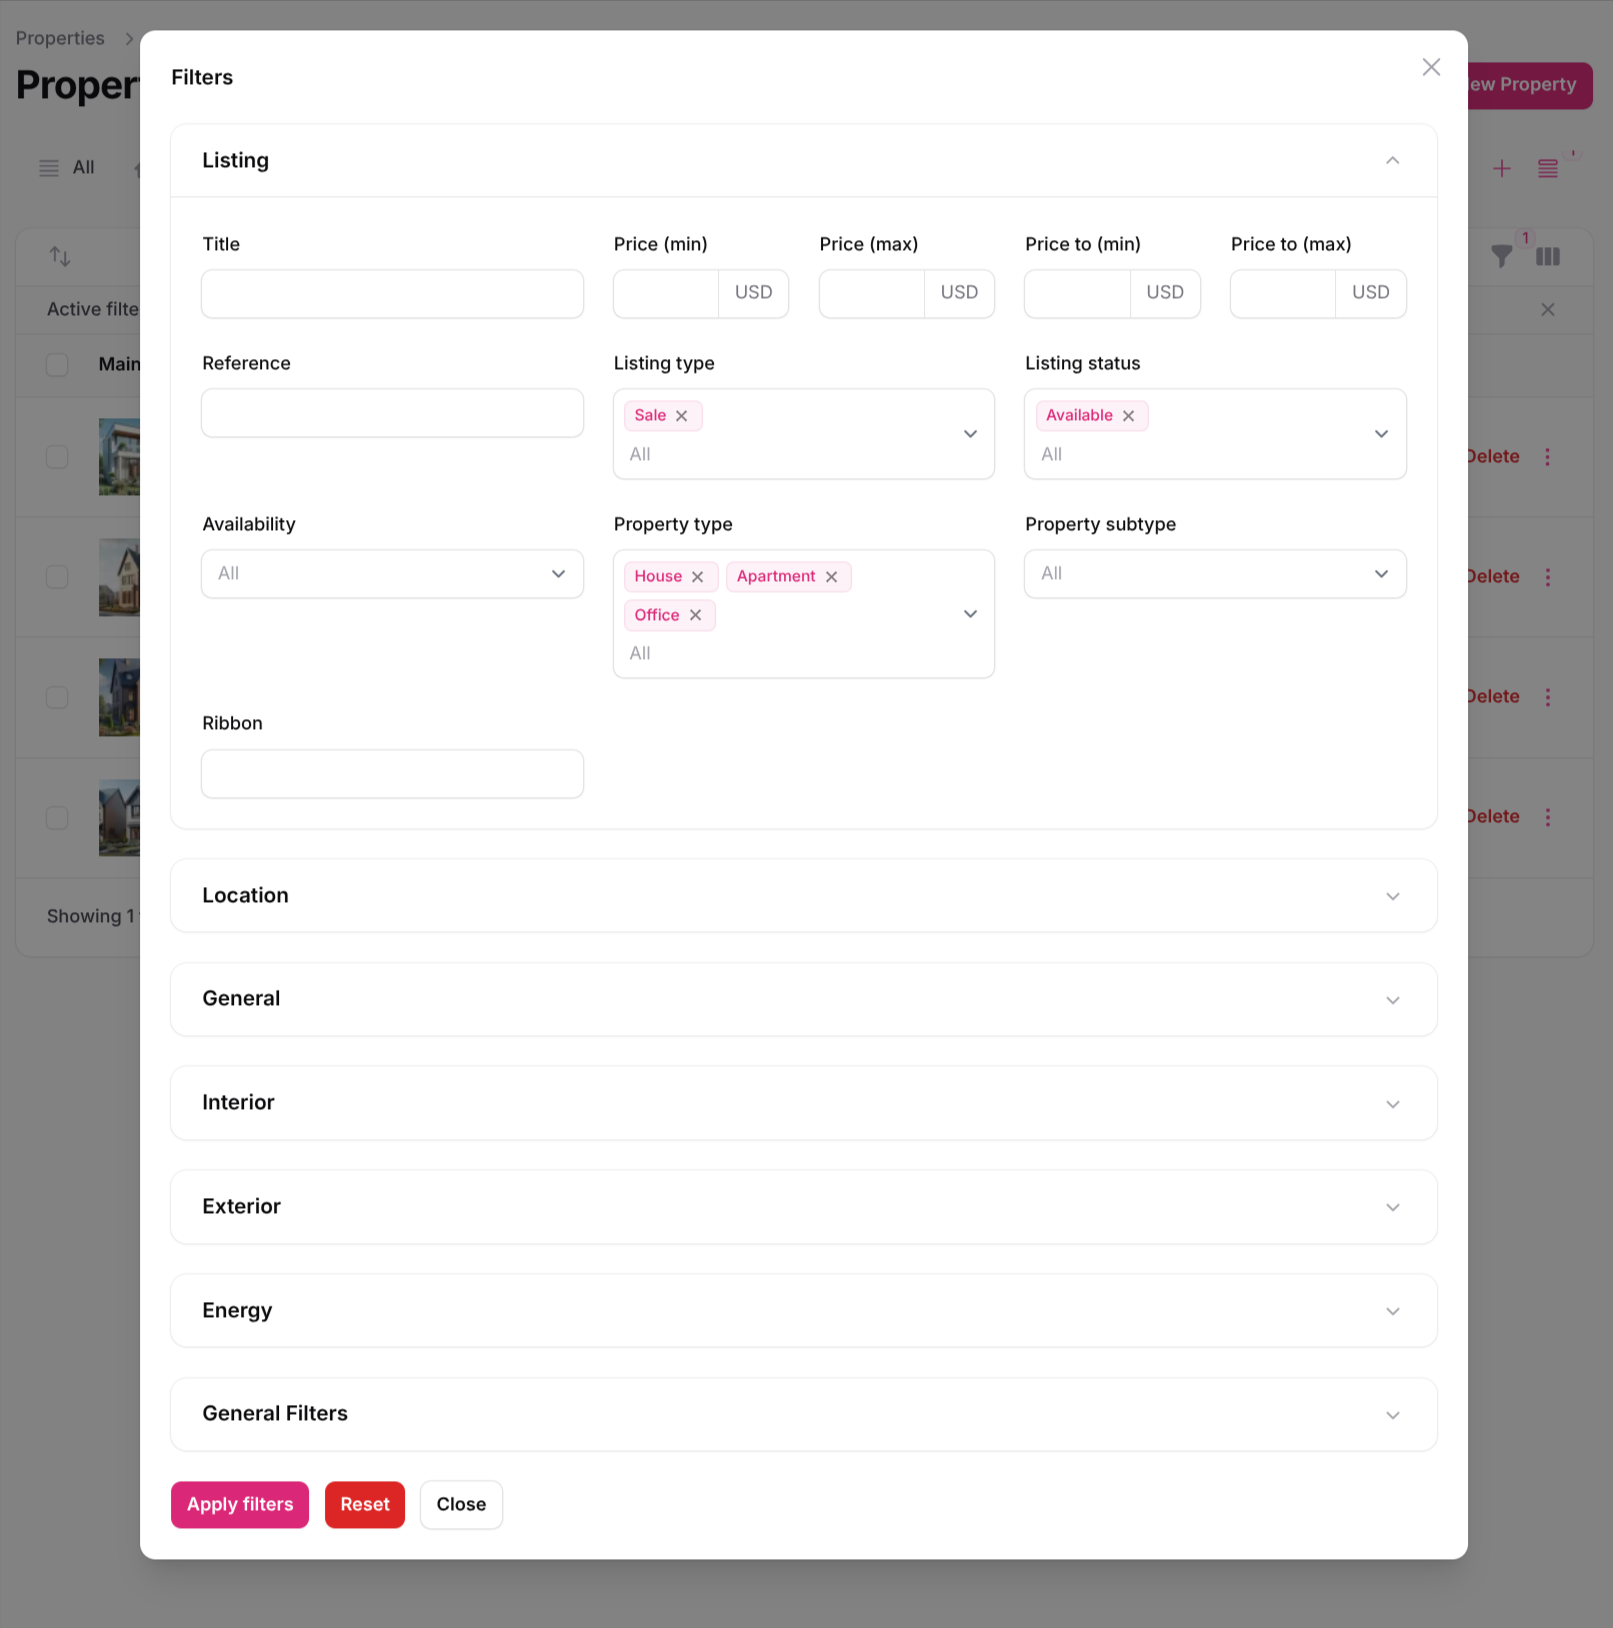
You can filter your properties by various criteria including:
- Property Type (House, Apartment, Commercial, etc.)
- Status (For Sale, For Rent, Sold, etc.)
- Price Range (Minimum and maximum price)
- Location (City and postal code)
- Any selection field, numeric field, or short text field, including custom fields you've added yourself
Using Filters
- Click the filter icon to open the filter panel
- Select the criteria you want to filter by
- Set your filter values (e.g., price range, property type)
- Click "Apply" to see the filtered results
- Use "Reset" to remove all active filters
Column Selection and Arrangement
Customize which columns are visible in your table and arrange them in the order that works best for your workflow.
How to Access Column Options
- In the table header toolbar, look for the column toggle icon
- Click the column toggle icon to open the column selection dropdown
![]()
Managing Columns
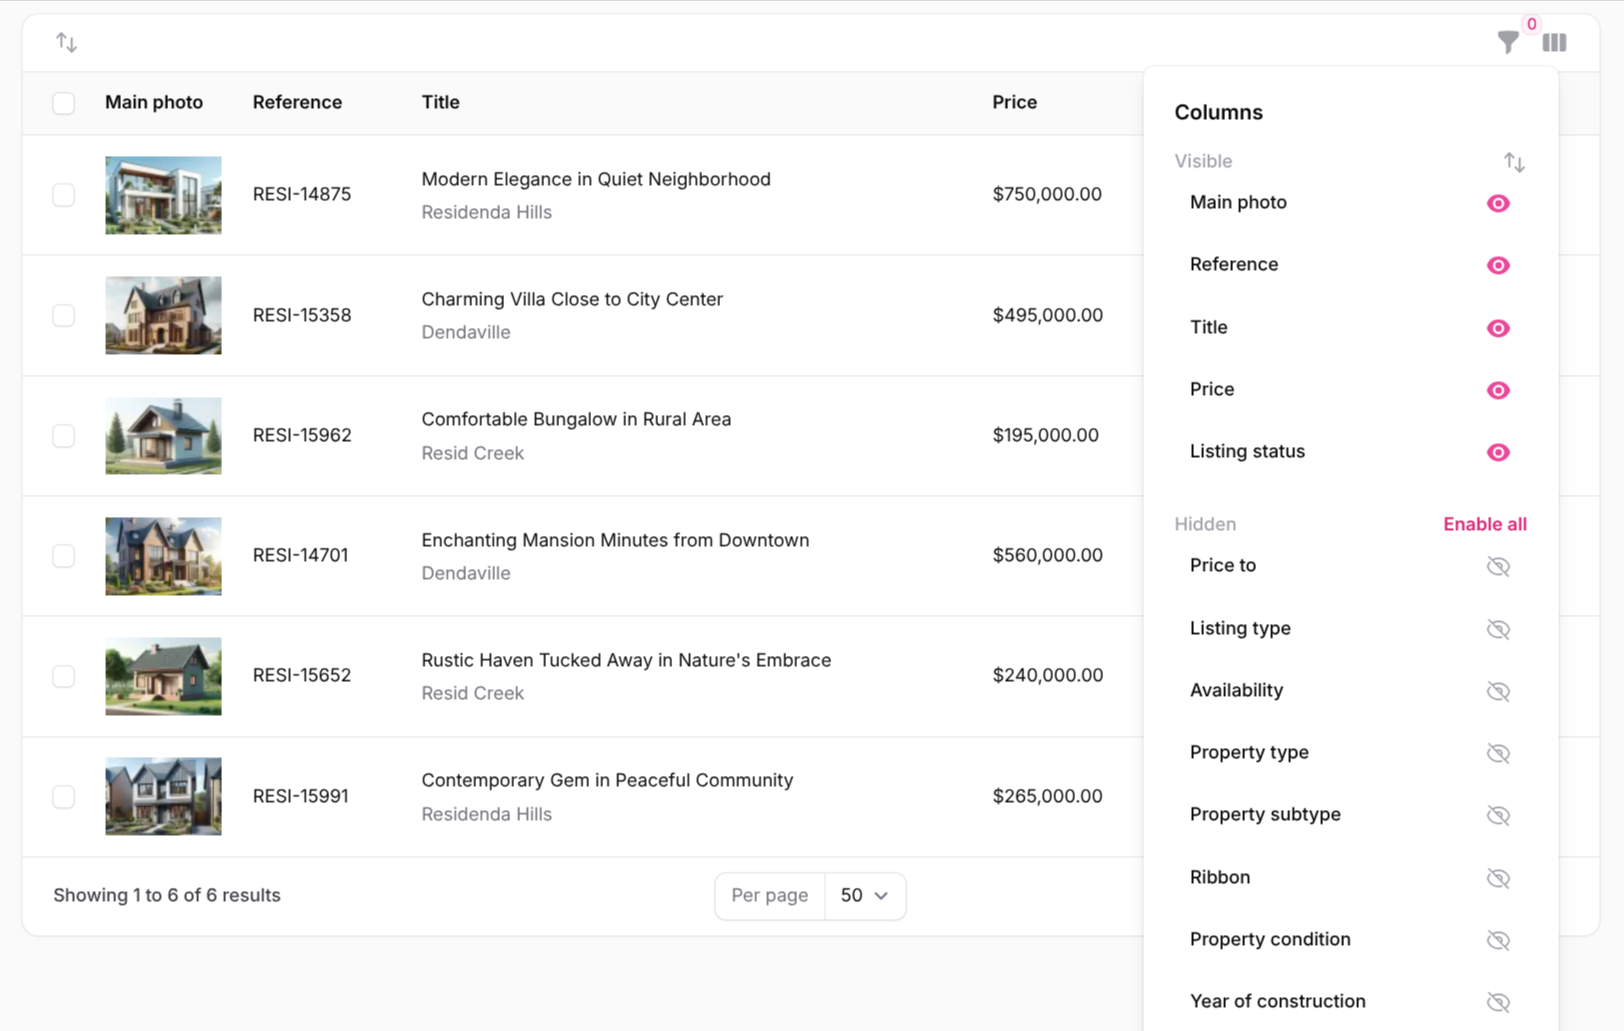
The column selection dropdown allows you to:
- Show/Hide Columns: Click the eye icon next to each column name to toggle visibility
- Reorder Columns: Click the arrows (up/down) icon next to a column name, then drag and drop it to your preferred position
Saving Custom Views
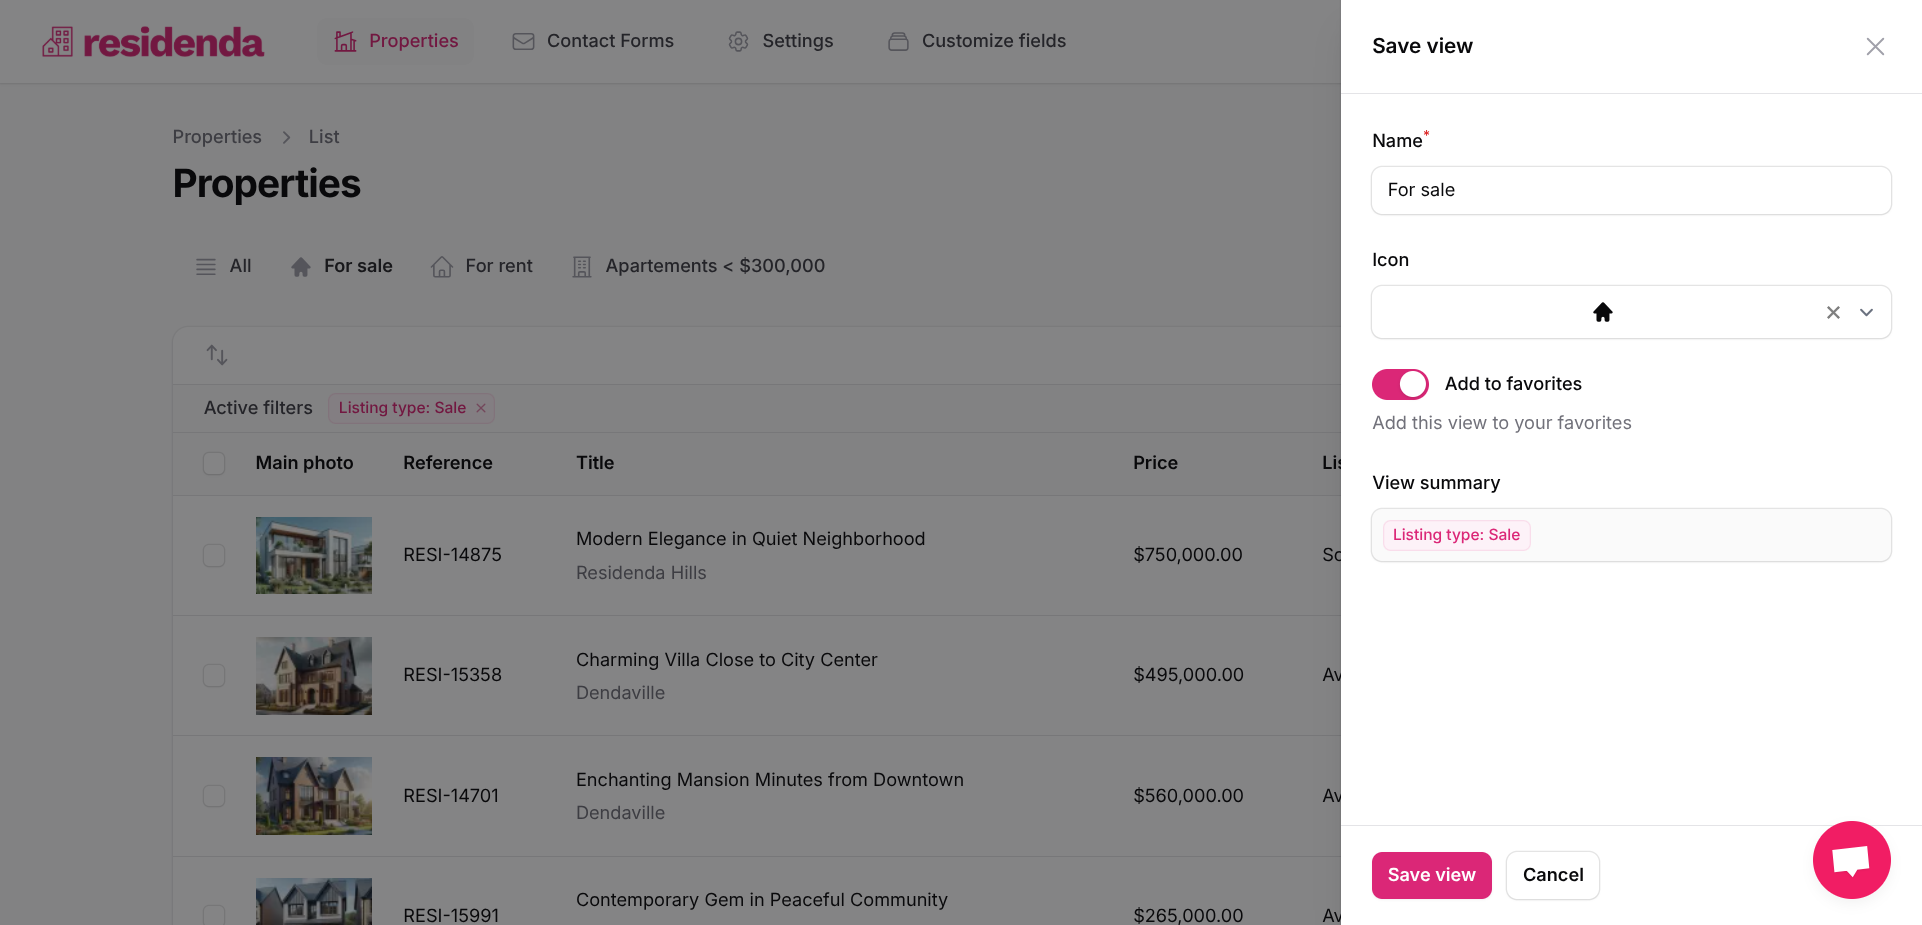
Once you've configured your table with the right filters and columns, you can save it as a custom view for quick access later.
Creating a Custom View
- Set up your table with the desired filters and column configuration
- Look for the plus icon in the favorites bar and click it

- Give your view a descriptive name, and optionally an icon. Check "Add to favorites" if you want the view to be directly available as a tab above the table
- Click the "Save View" button at the bottom
- Your view is now saved and can be accessed anytime
Managing Your Views
The view manager allows you to organize and maintain your saved views.
Accessing the View Manager
- Look for the view manager icon in the favorites bar
- Click the icon to open the view management panel
![]()
View Management Options
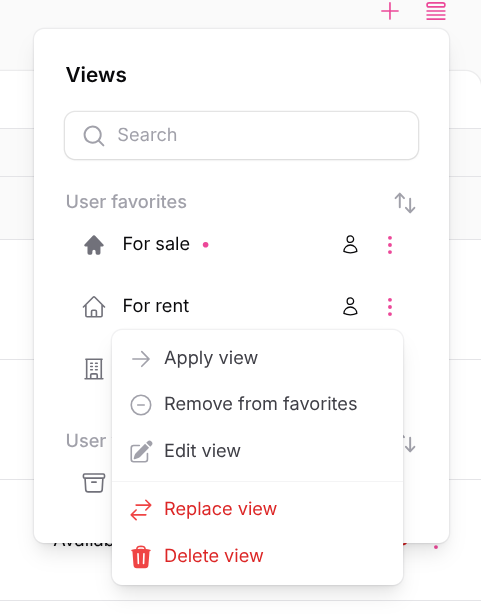
Here you see a list of all your views, first the favorites, that are displayed as tabs above the table, then the other ones, that can only be accessed from here.
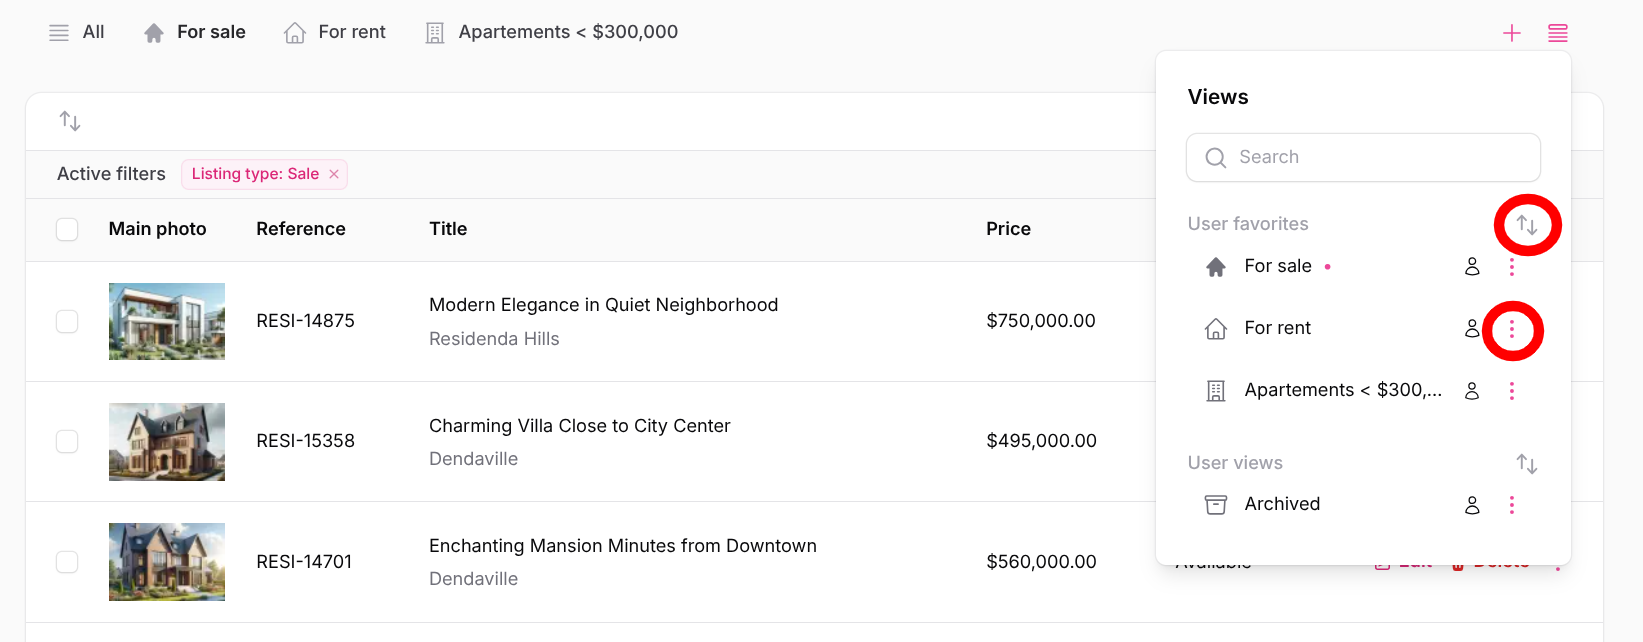
On the right of every view, there are three dots. Clicking this opens a dropdown with the following options:
- Apply view: Switch to this view immediately
- Remove from favorites: Remove the view from the favorites tabs (only available for favorite views)
- Edit view: Modify the name, icon, or configuration of the view
- Replace view: Update the view with your current table configuration (filters and columns)
- Delete view: Permanently remove the view
